

What Is Multi Point Perspective
How to Draw Multi-Signal Perspective Sketch with Colour Markers
ANYONE CAN Depict A MULTI-POINT PERSPECTIVE VIEW! (Follow-Forth Video)
In this article, I am drawing a country-side theme from my imagination with a multi-point perspective. I'll guide yous footstep-by-stride through the procedure and explain the principles behind it. If you are a beginner in sketching, I believe this commodity will help yous to be more confident in cartoon perspective while learning all the fundamentals. Let's get started!
What is a multi-bespeak perspective? Can I all the same sketch a multi-signal perspective as a complete beginner in cartoon? How many vanishing points are there in a multi-point perspective drawing? Today, I am going to answer all of these questions while cartoon a state-side theme with you.
At the same fourth dimension, yous tin can too draw along with me by watching this Youtube video below.
Let's go started!
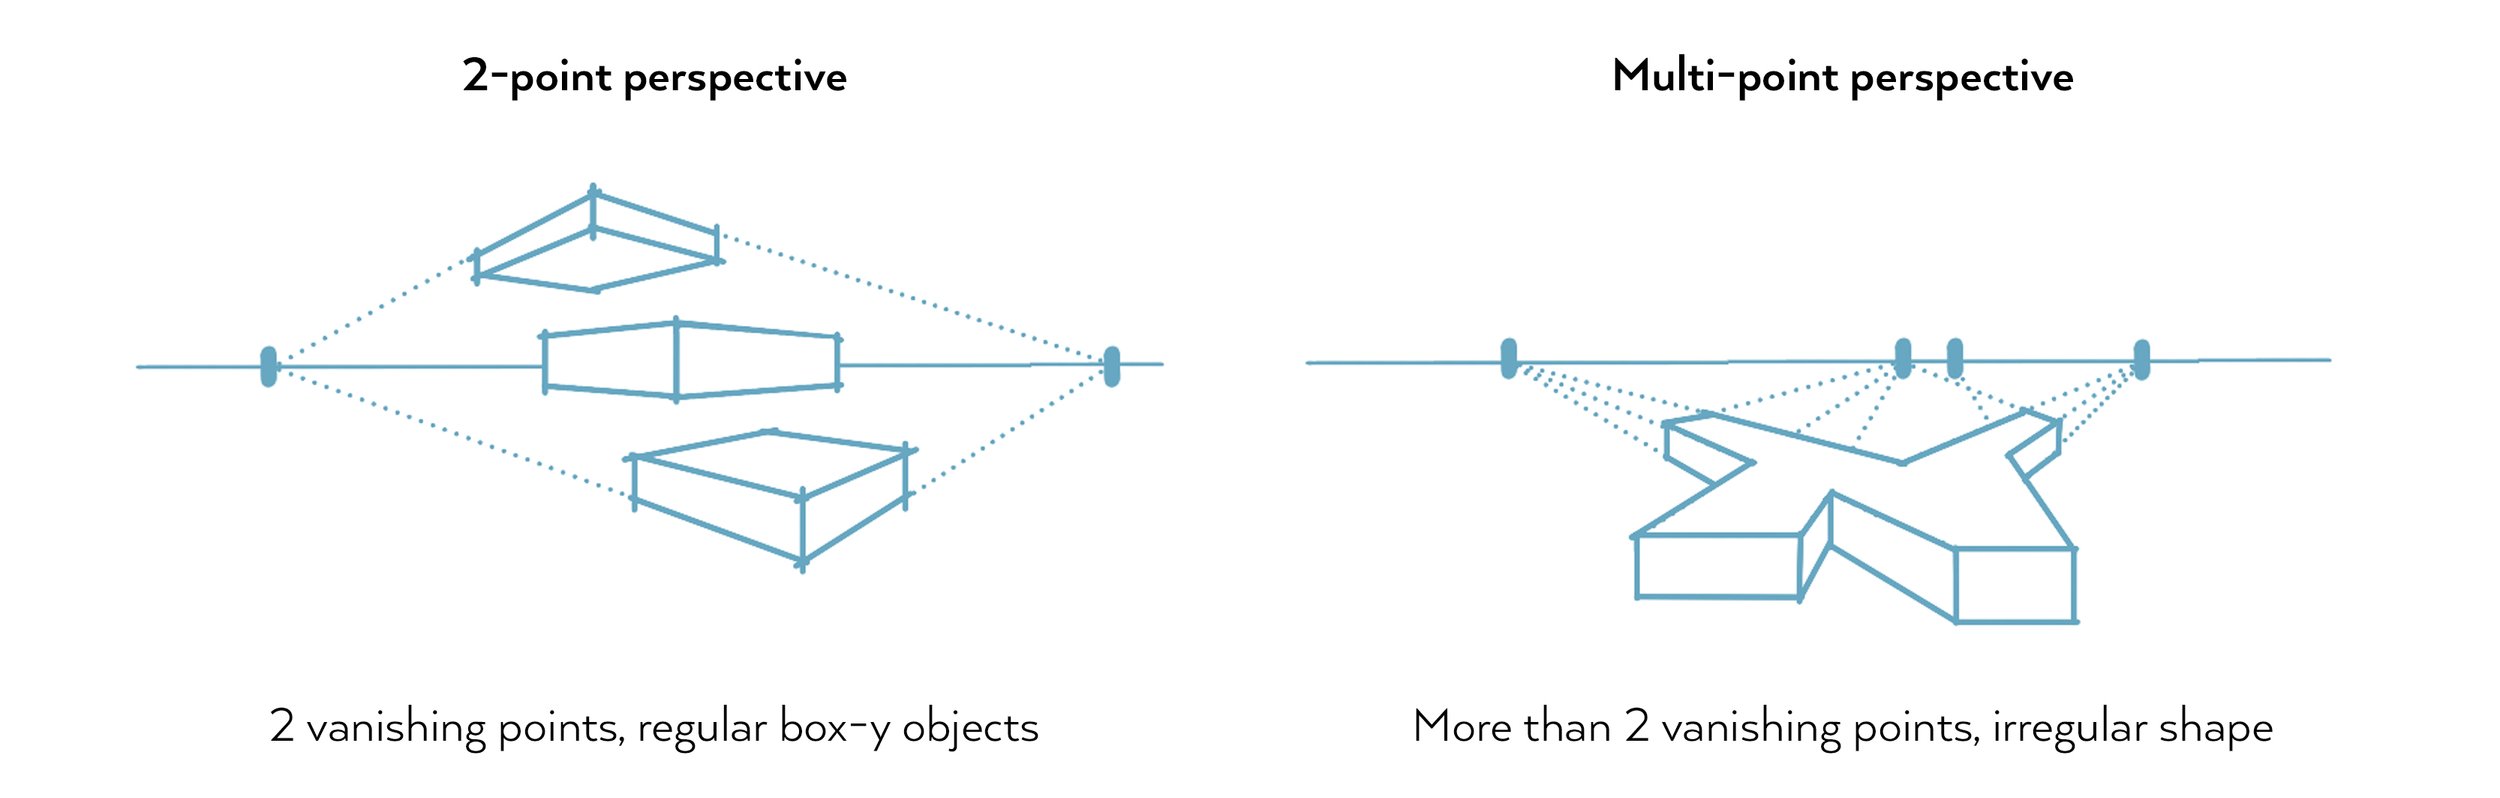
A multi-betoken perspective is a scenario with more than ii primary Vanishing Points on the Horizon Line.
It is actually a very common and realistic scenario that happens when objects in your perspective view
-
don't lie in only one orthogonal grid (similar in a typical two-point perspective),
-
they are non parallel to each other or are slightly rotated,
-
or have irregular shapes (due east.g. hexagon).
Learning how to describe a multi-point perspective is peculiarly helpful if you are an urban sketcher. Every curved route technically needs multiple vanishing points describing its changing directionality. Moreover, it can create a more realistic impression, add visual intereset and better guide the viewer'south eyers accros your image.
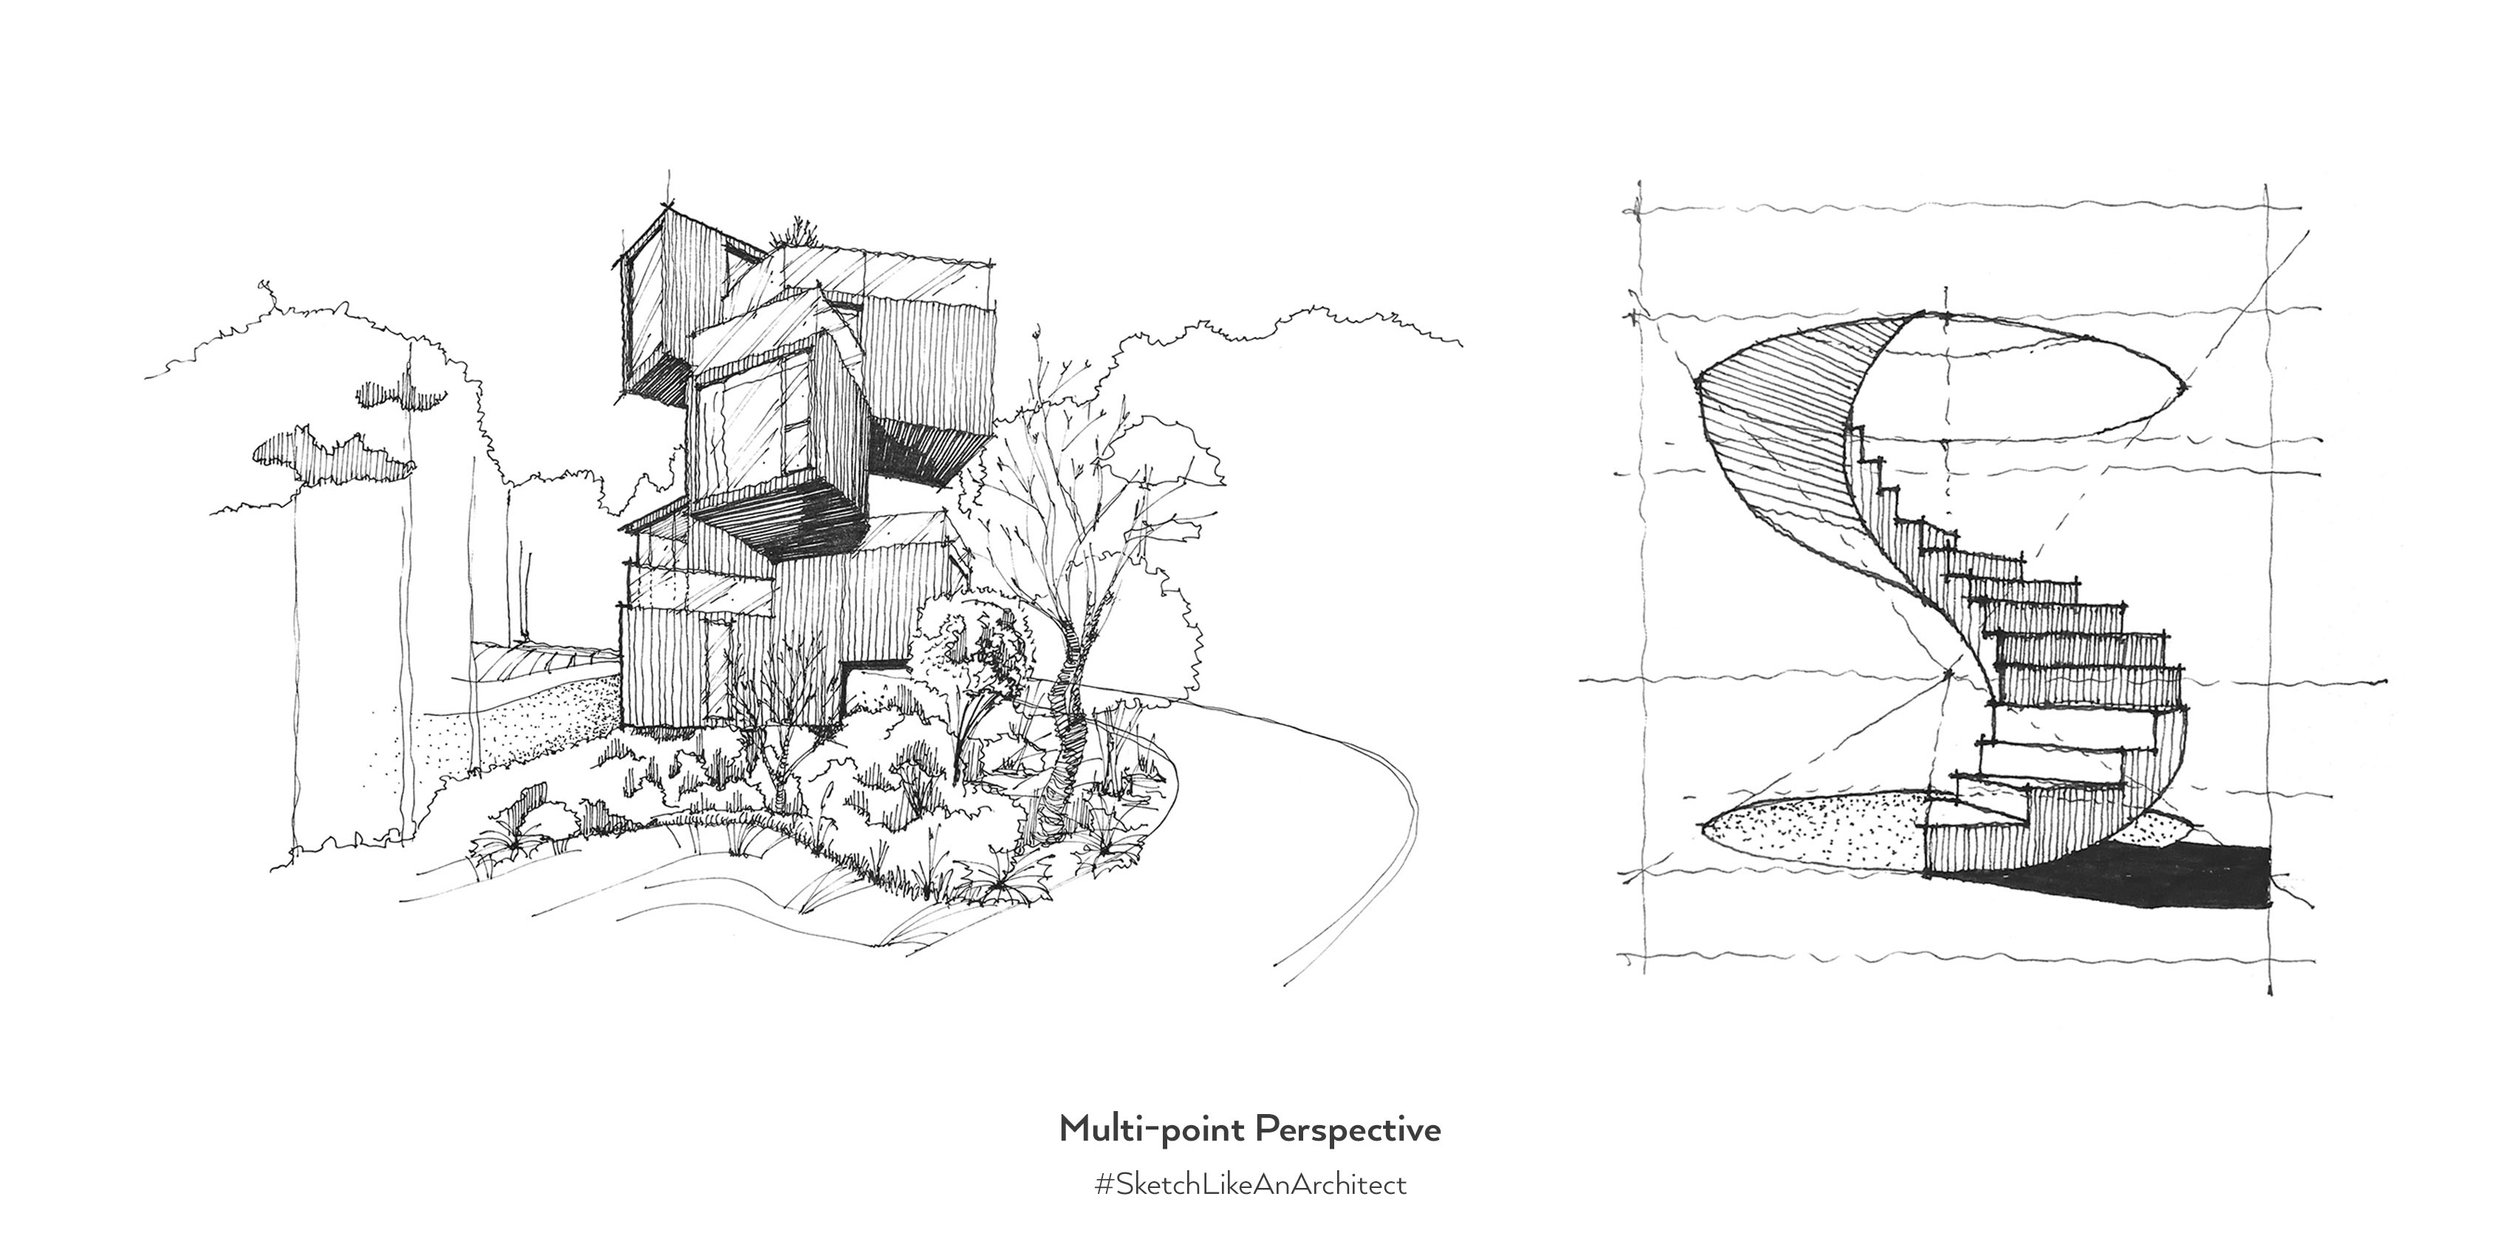
Here are a few examples of a multi-point perspective view for better visual explanation:
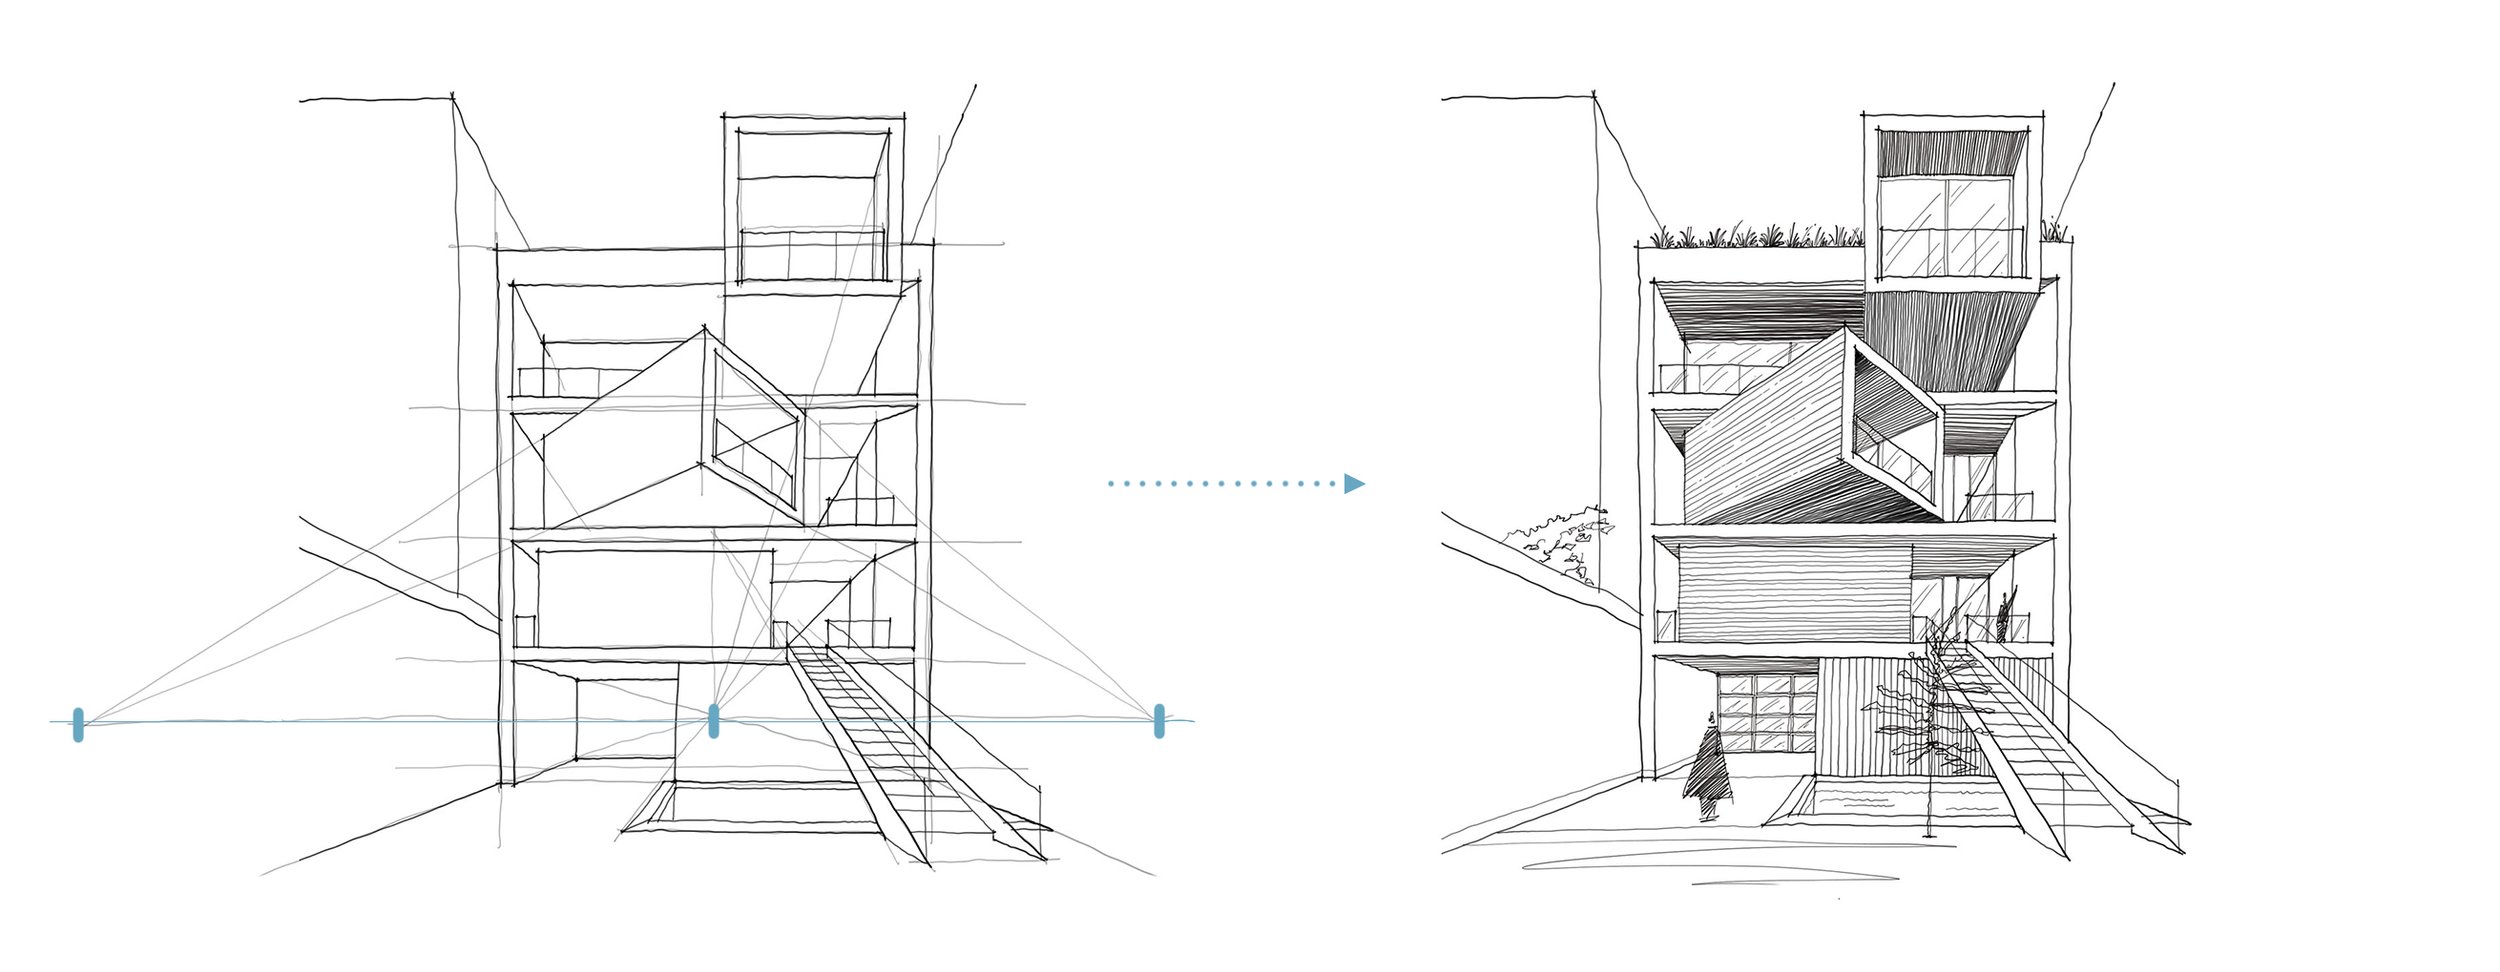
Sharifi-Ha House in Tehran, Iran - The rotated middle box doesn't fit into a uncomplicated one-point perspective view, and we demand 2 more than vanishing points to describe information technology. Detect the full footstep-by-pace tutorial on this alongside other 99 famous buildings in my newest book 100 Buildings & Archtiectural Forms.
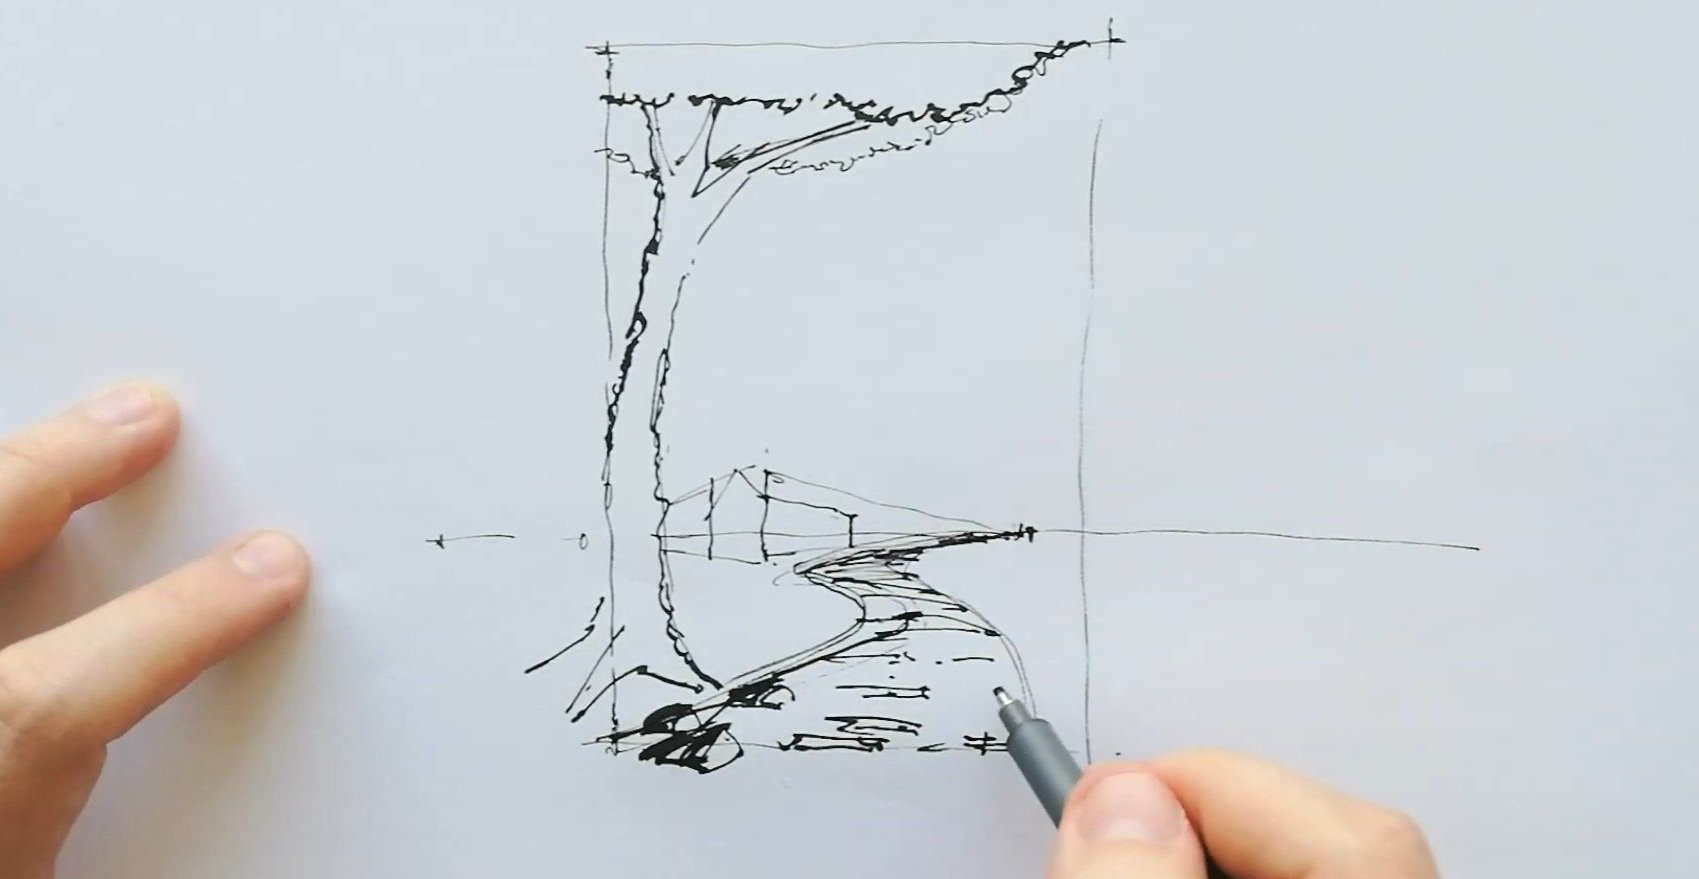
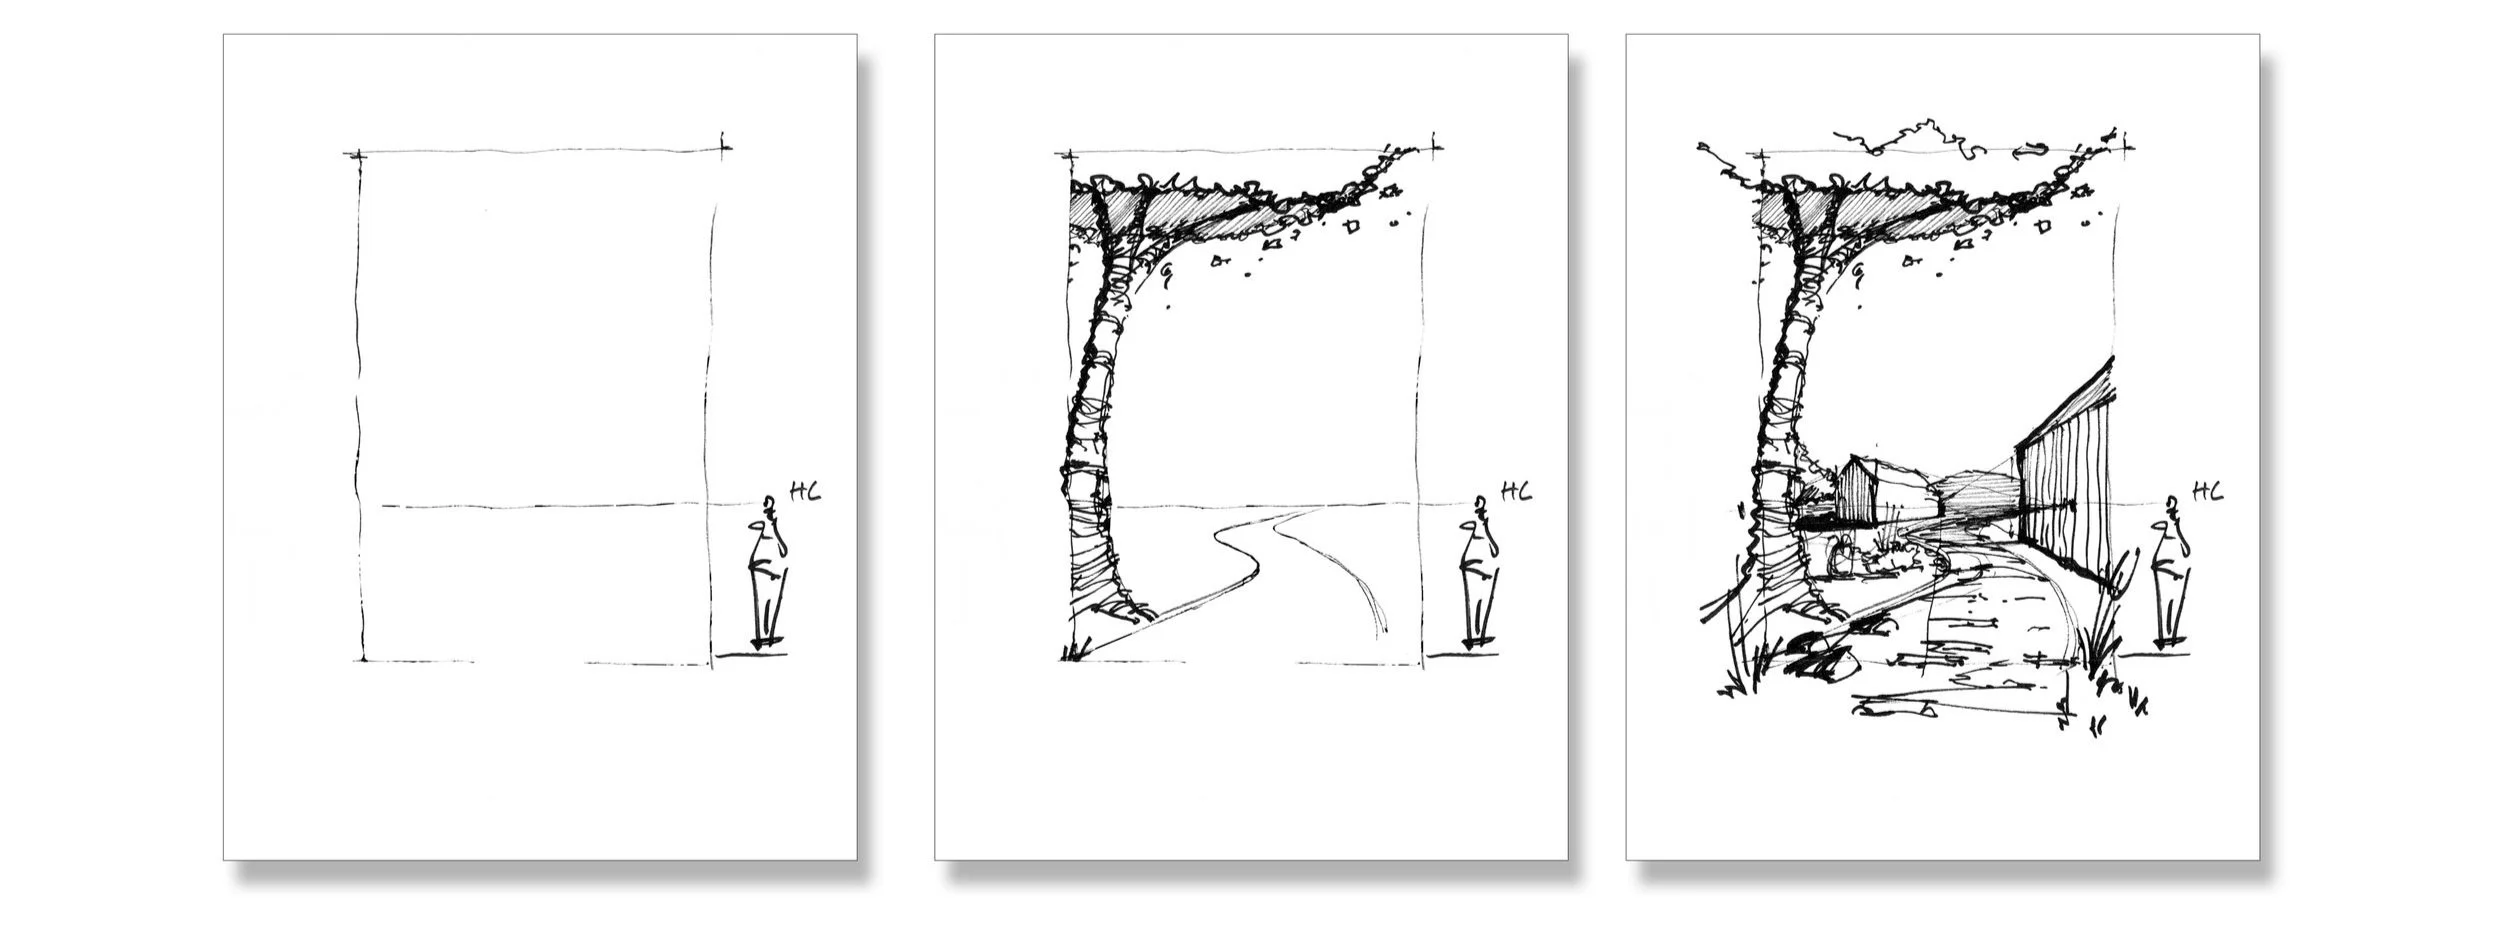
Step 1: Preparation
Offset, I draw a picture plane which acts as a frame to fit in my drawing. Since it is countryside scenery, I draw a tree in the foreground to show the context. So depict the horizon line at the lower third of the picture aeroplane, which is a relatable middle-level view.
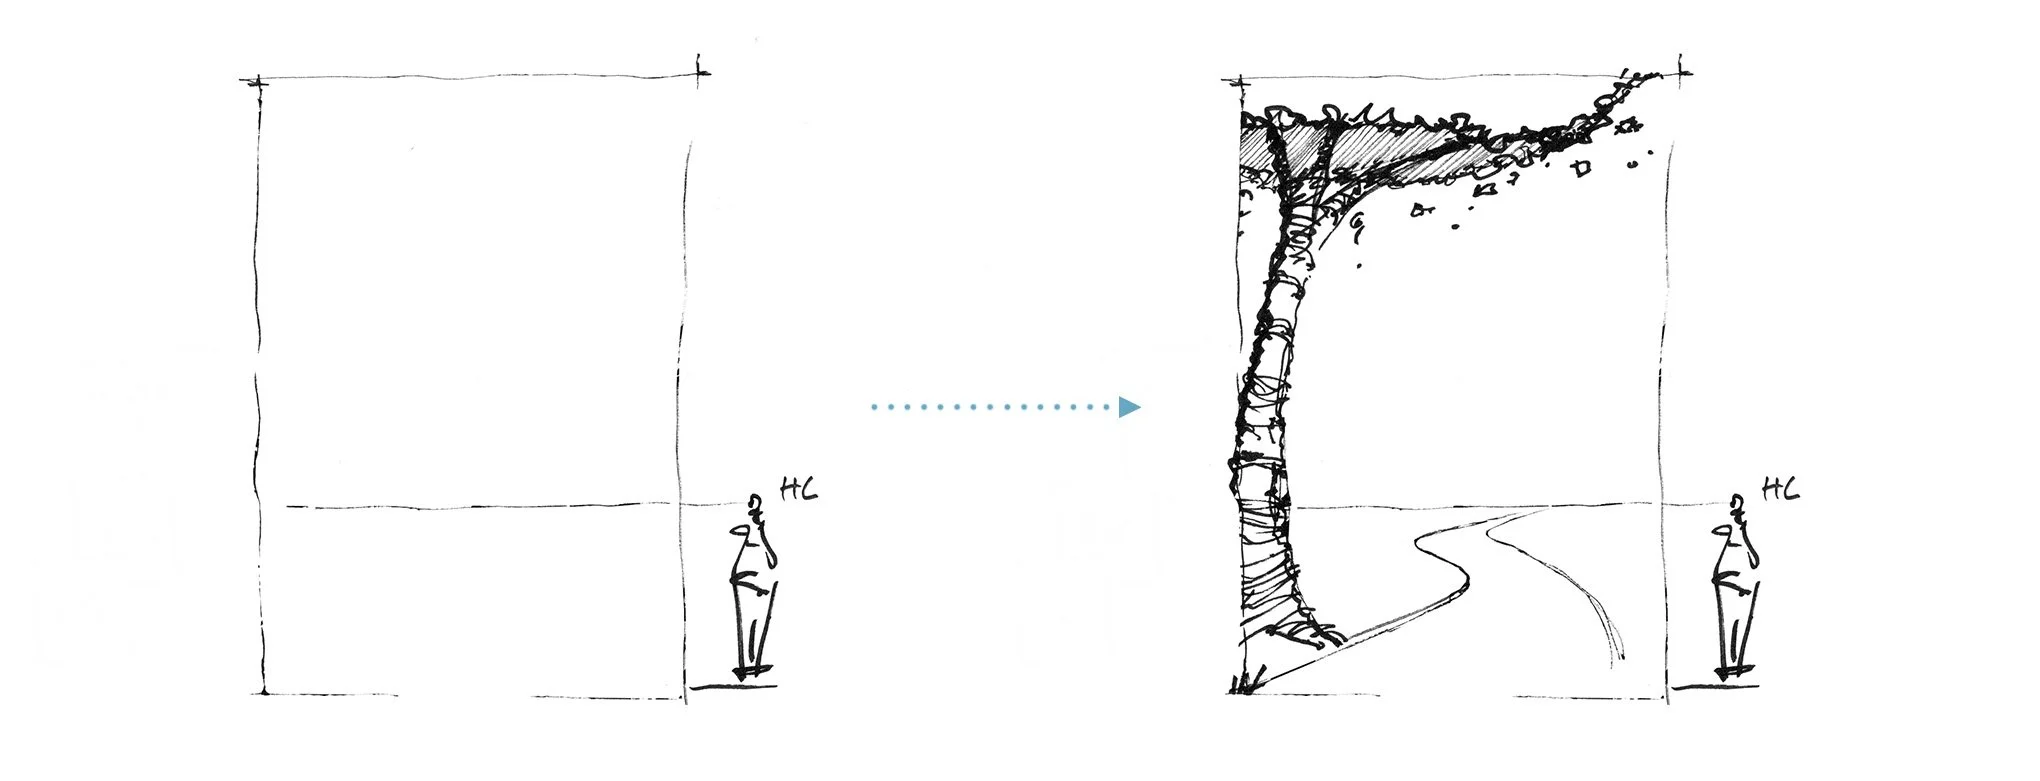
A quick Tip: It is always a good idea to avoid straight roads or streets in your images. Introduce a curved road instead and so that it nicely leads the heart across the sketch.
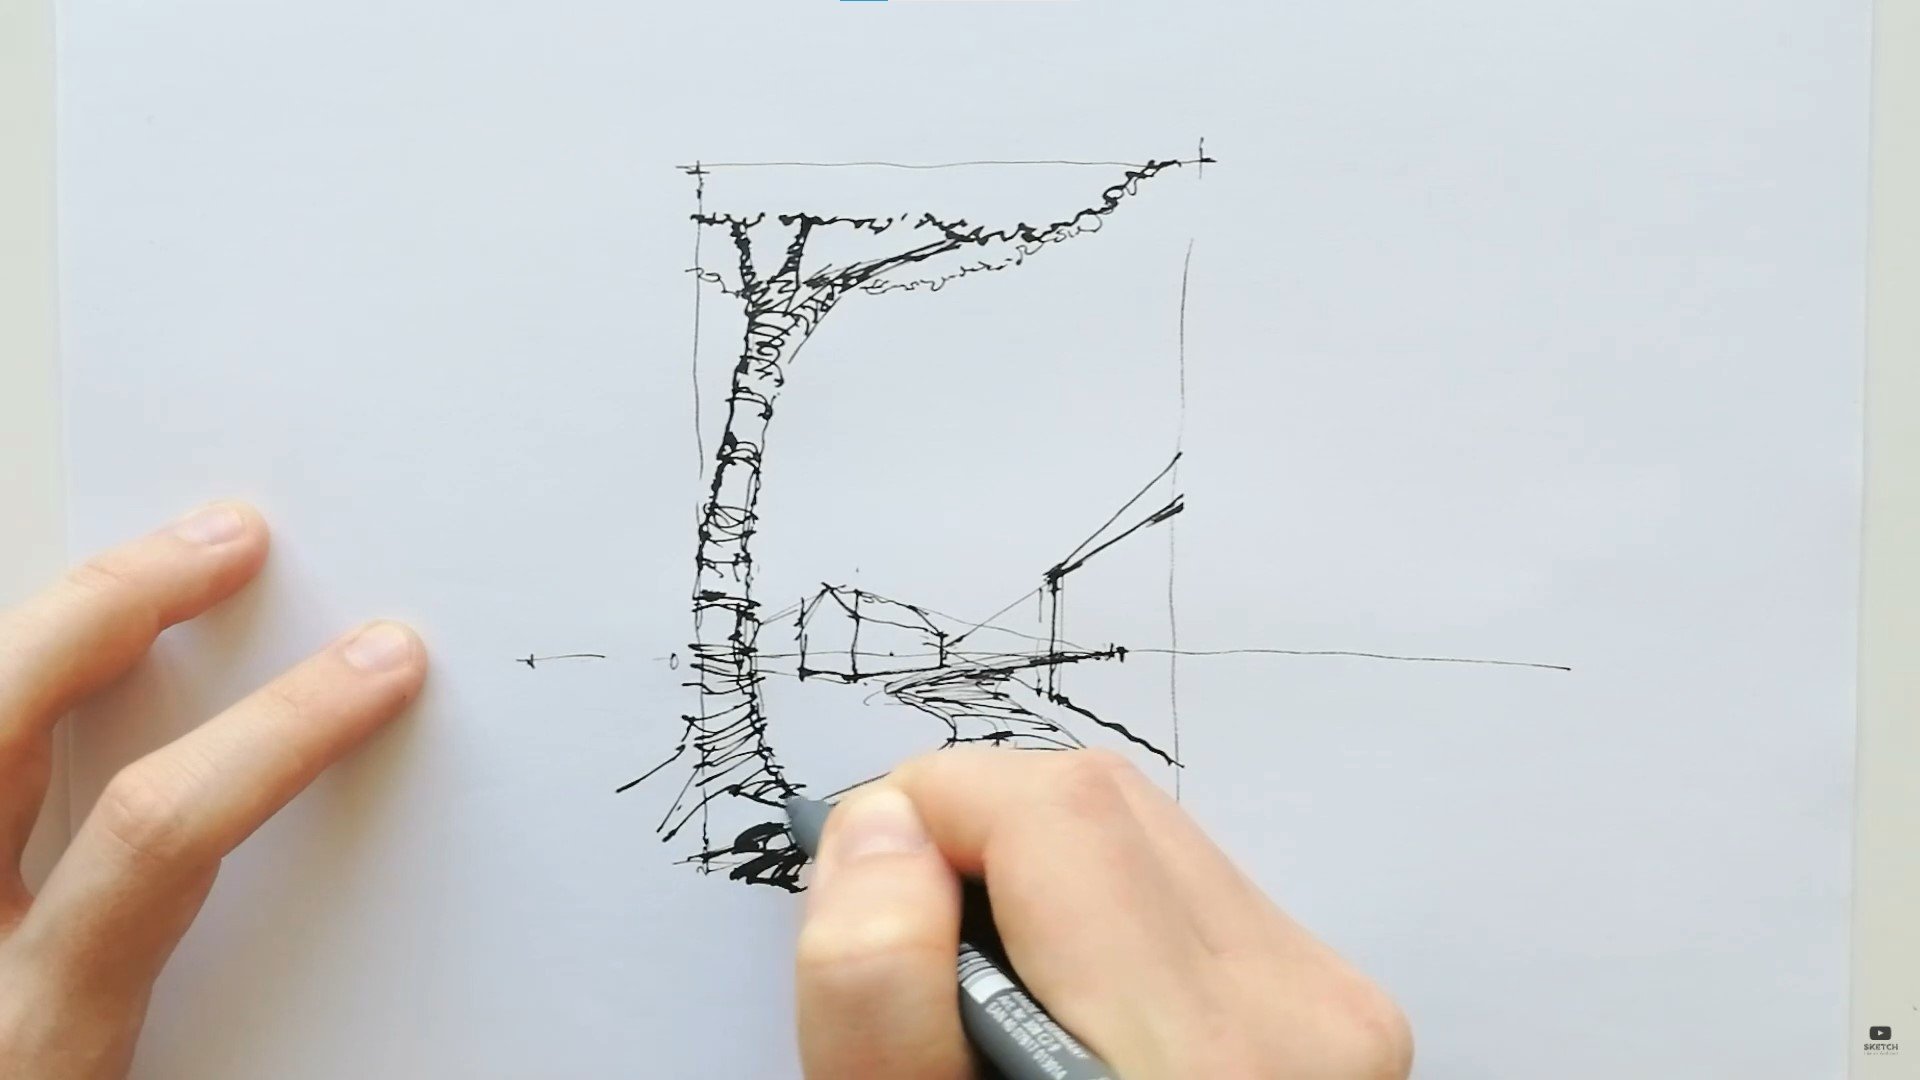
Step ii: Calculation Objects & Selective Texturing
Next, I placed a small barn along the road. If yous look closely, the walls are divided roughly into halves past the horizon line which sets the scale.
When placing different objects in your scene, ever enquire yourself: how does it relate to the viewer's position?
I also used selective texturing to suggest a stony route and extended the texturing slightly outwards from the movie plane to create more depth. Then I sketch another befouled and positioned it closer to the viewer. This is when another vanishing point is created and makes information technology a multi-point perspective view.
Step 3: Creating More Contrast & Depth
Put in some effort to add together details to the foreground object. It is considering a higher level of detail and contrast can help support the illusion of depth. In this instance, I am adding more details to the tree which is framing the view.
At the same time, continue the rules of atmospheric perspective in mind, where the thicker strokes are used in the foreground. Every bit nosotros depict elements towards the background, further from the viewer, thinner lines are used.
Information technology is also a exercise commonly used in architecture department drawing to distinguish what elements are being cut and what is displayed in elevation.
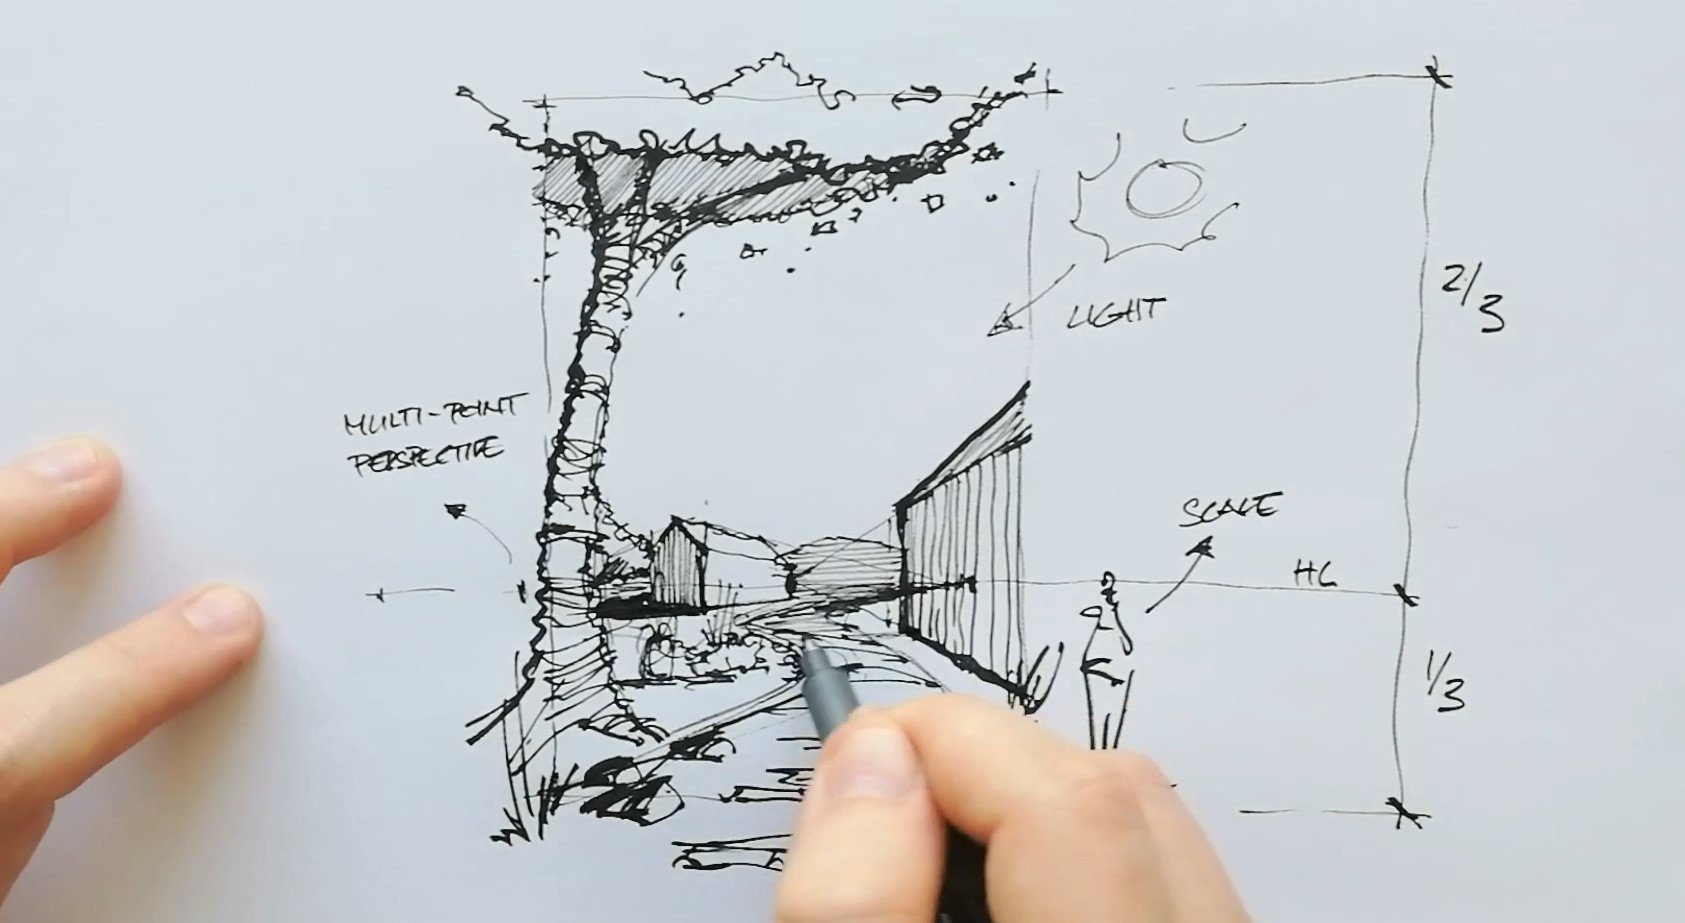
Step 4: Cast Shadow
I added a couple of annotations and homo figures to ballast the calibration. Check out this article to learn how to populate your sketches, and why it is so important to draw human figures.
And so, I movement on with adding vertical hatching to the shaded surfaces of the barns. If you await closely, I drew a sun exterior the picture plane to remind myself where the light source is.
To learn more about constructing shadows in perspective, check out this stride-past-stride tutorial from my blog.
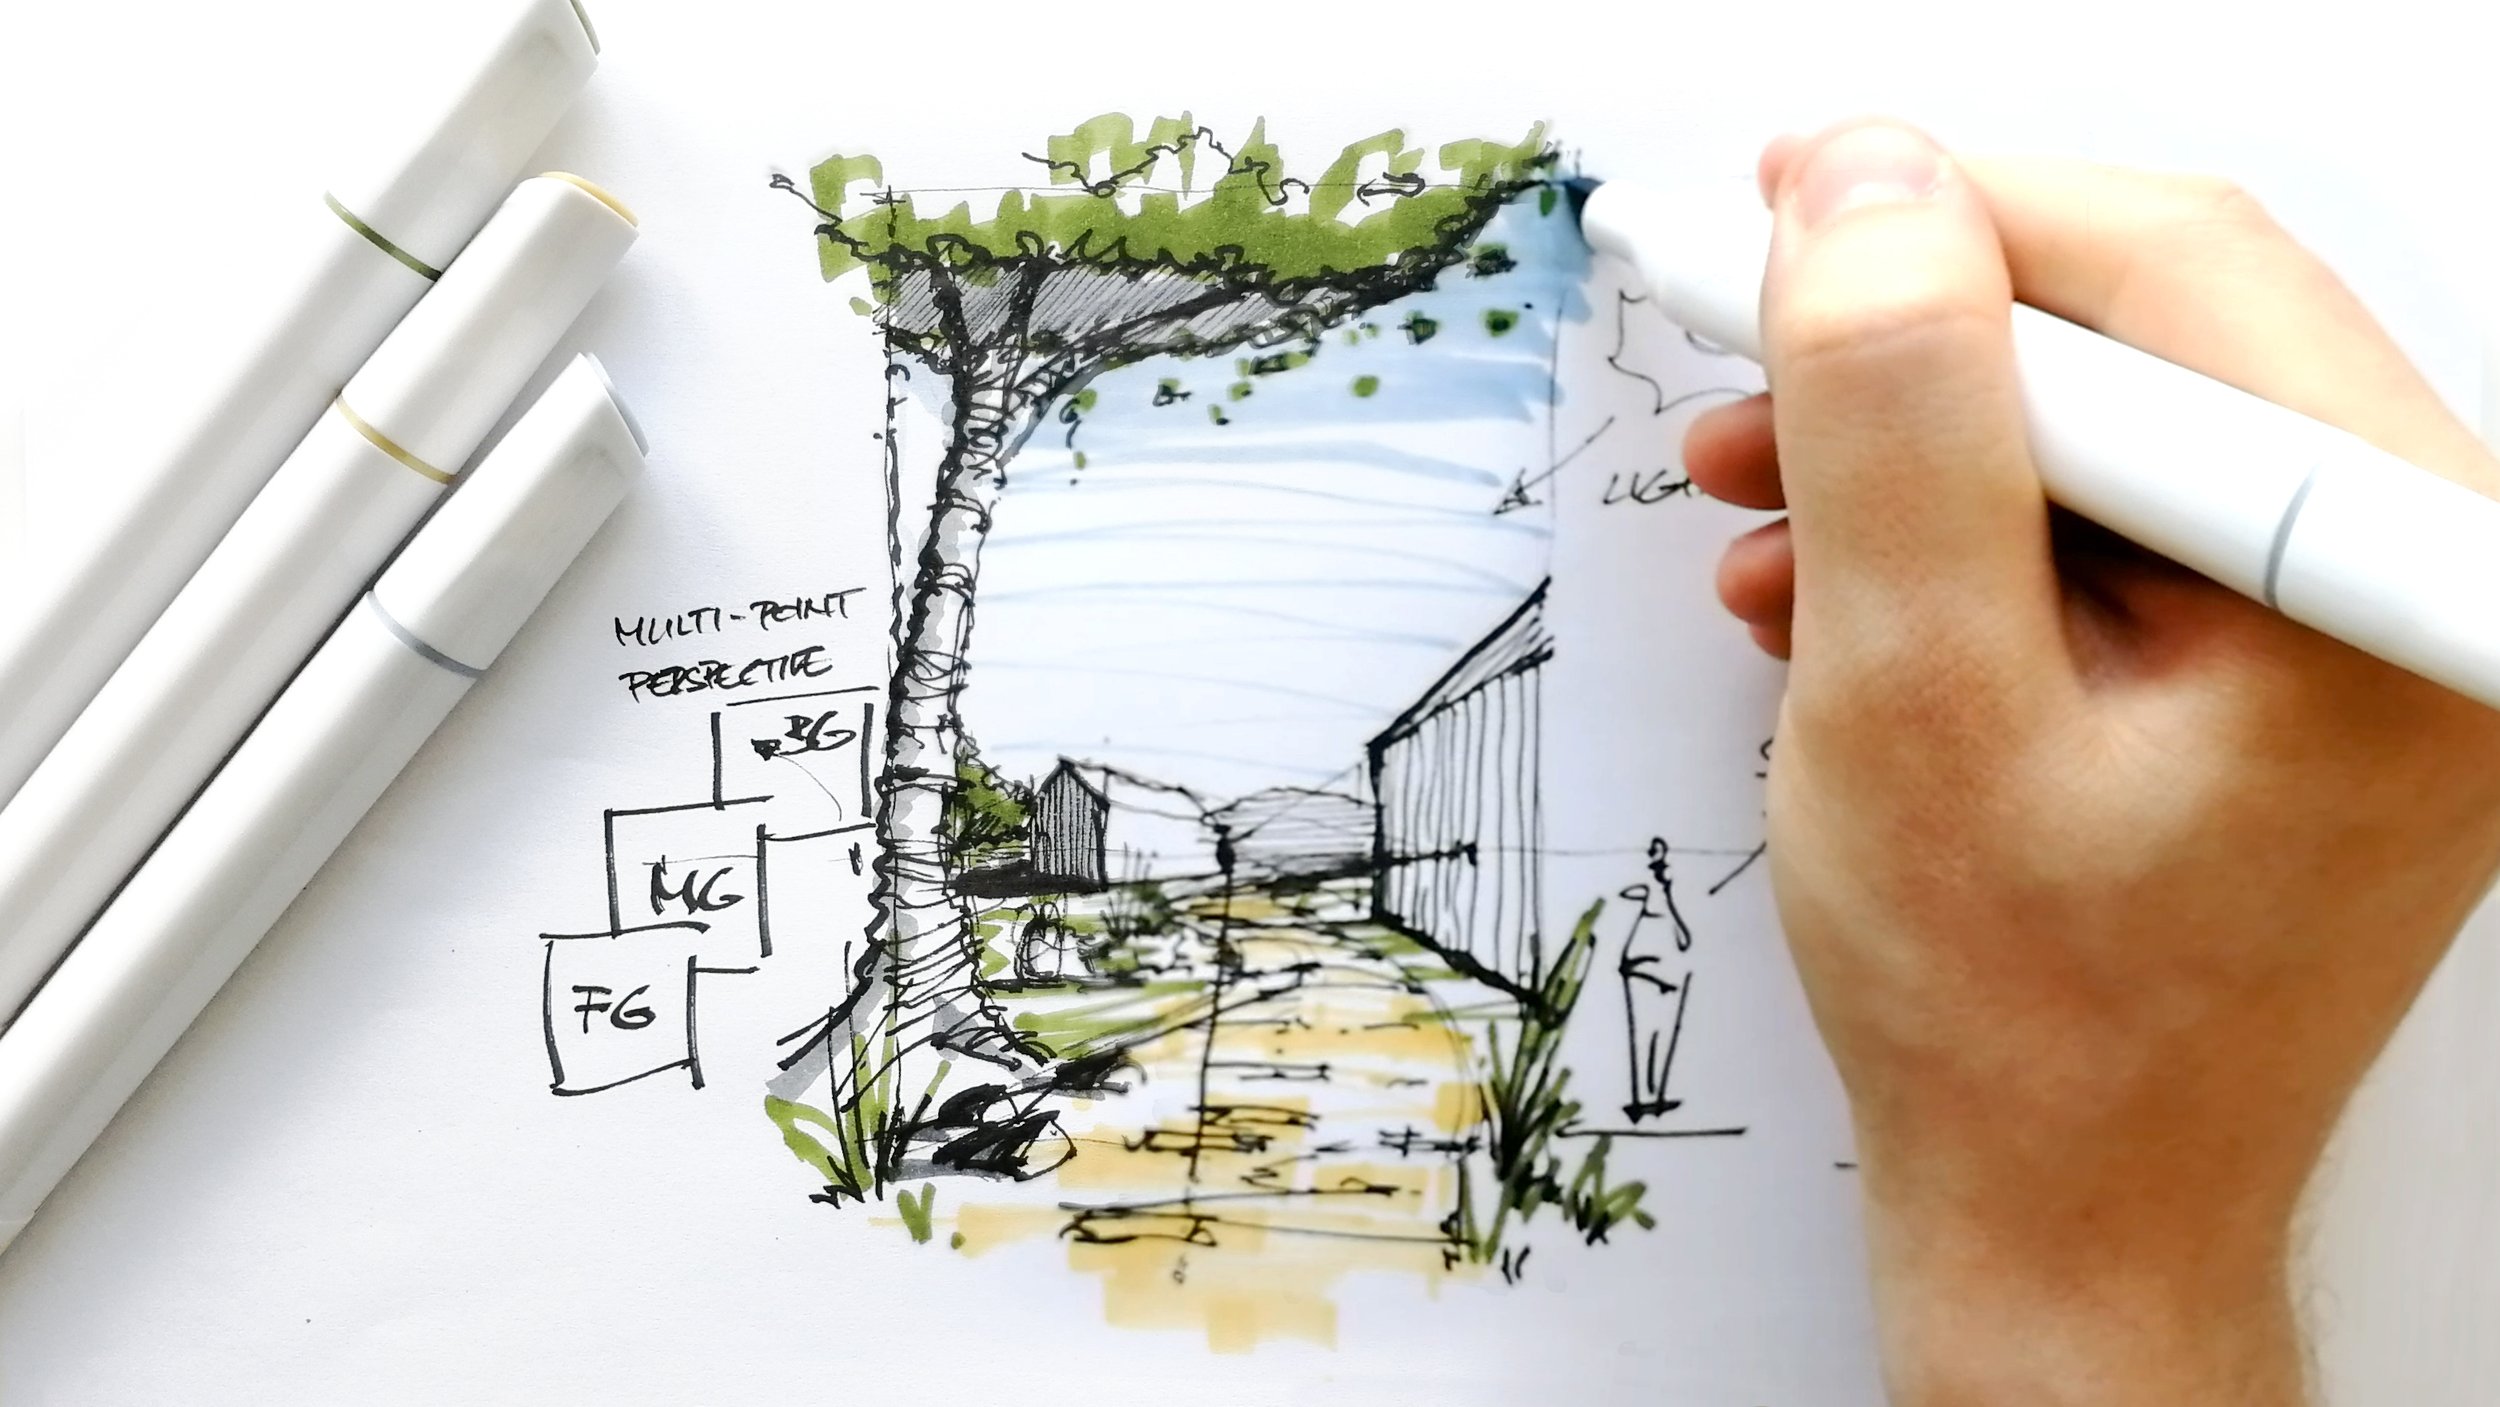
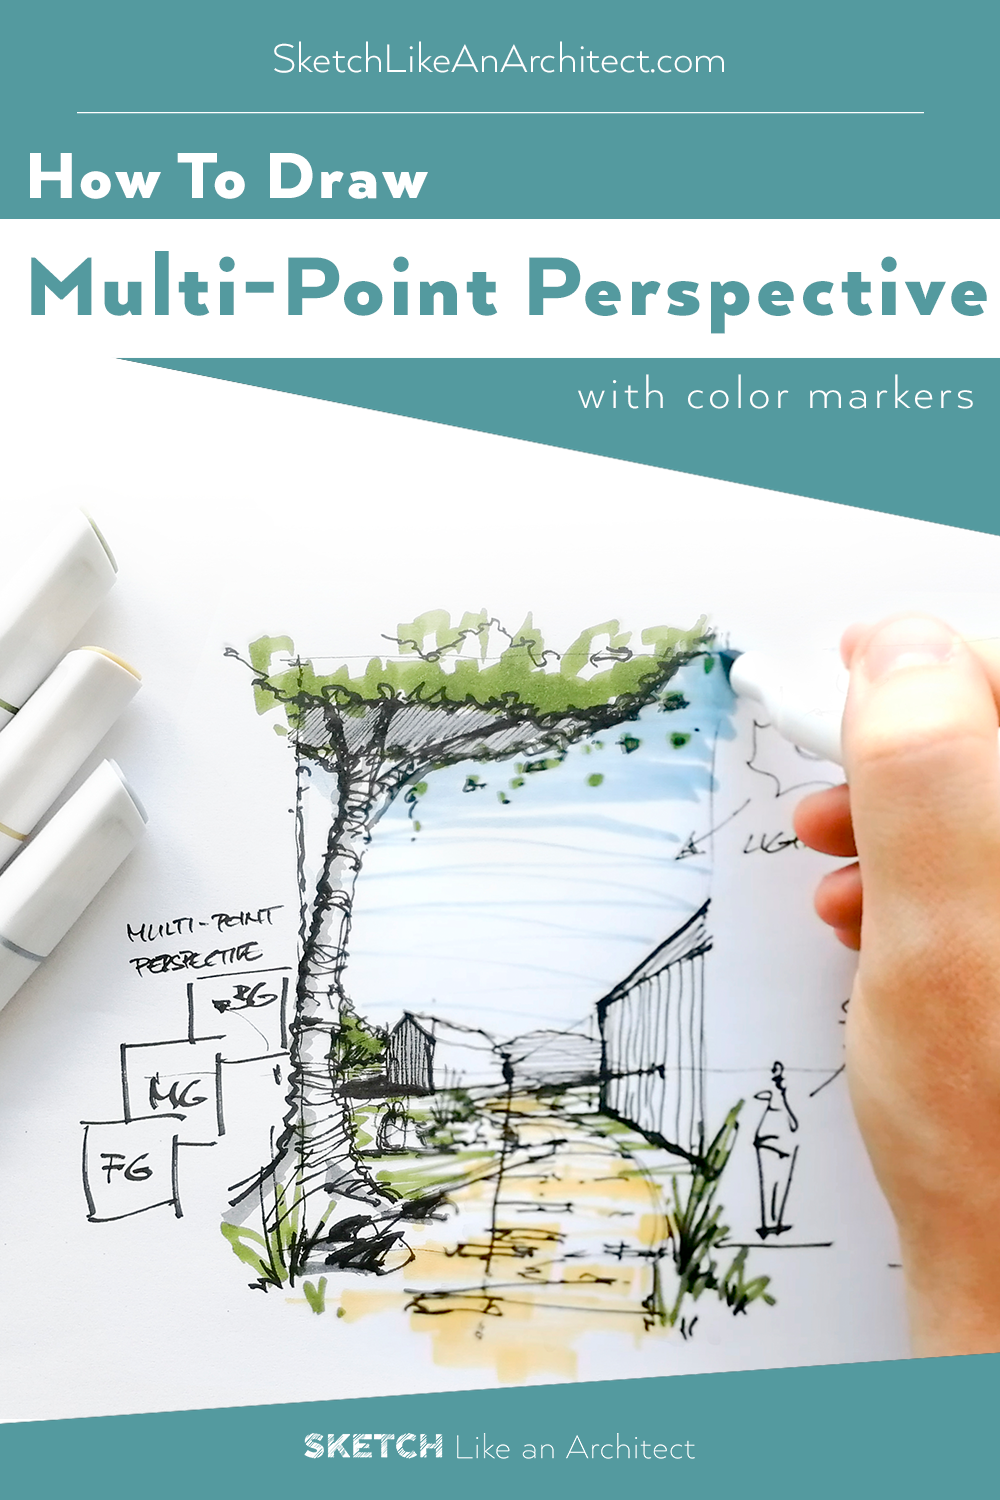
Step 5: Colouring with Markers
One of the questions that I get asked most often is — What color marking am I using?
If you are a beginner in hand sketching, most likely y'all will be overwhelmed by the vast choices of tools out in that location. This is why I have organized all of my favorite tools in a listing to help you lot make amend decisions. Click this link to read.
After coloring the sky, copse, and route, I used a brush pen to darken the shadows and increase the dissimilarity of the sketch. And voila… the final result looks something like this.
If you desire to sketch along, I have prepared iii process sheets to brand it easier for you to follow allong or only focus on the coloring office with markers. Click the button below to download the practice sheets for costless.
What's next?
-
I promise you enjoyed this article - if you did, bank check my other blog posts below!
-
Save this article on Pinterest for future reference & inspiration 👇

What Is Multi Point Perspective,
Source: https://www.sketchlikeanarchitect.com/blog/how-to-draw-multi-point-perspective-sketch
Posted by: branamwithful.blogspot.com
0 Response to "What Is Multi Point Perspective"
Post a Comment